How to do Network Scanning using Kali Linux and Docker
Network scanning is a vital process in cybersecurity that allows professionals and enthusiasts to assess the security of their network infrastructure. By identifying open ports, active hosts, and potential vulnerabilities, network scanning helps in fortifying the network against potential threats.
In this tutorial, we will guide you through the process of setting up a network scanning environment using Kali Linux and Docker. We will cover everything from installing Kali Linux and Docker to setting up containers with appropriate scanning tools.
Essentials for Network Scanning:
Before we begin, ensure you have the following:
Ø A system with running Linux (preferably Kali Linux) with internet access.
Ø Administrative privileges on the system.
Ø Docker installed on your system.
Ø Basic understanding of network protocols and scanning concepts.
Note: Network scanning can be intrusive and potentially illegal if done without proper authorization. Ensure you have explicit permission to scan the target network before proceeding.
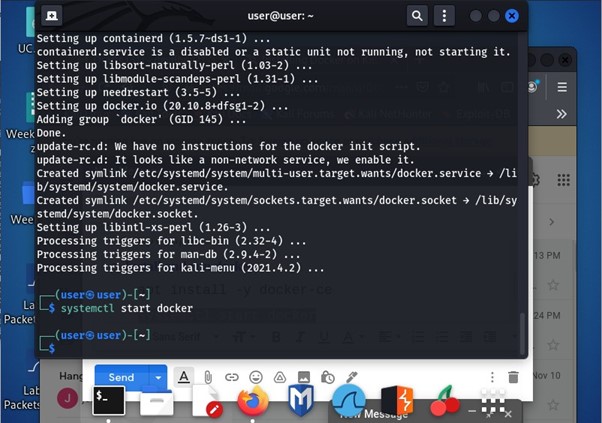
Installing Docker on Kali Linux:
You need to use the command apt install -y docker.io this will install docker into Kali Linux. You can see the picture below for reference:

Start the Docker in Kali Linux:
The command systemctl start docker is used to start docker in Kali Linux. For reference you can see the image below:
Install metasploitable2:
Once the docker is installed then it installs metasploitable2. The command used was:
docker run --name container-name -it tleemcjr/metasploitable2:latest sh -c "/bin/services.sh && bash"
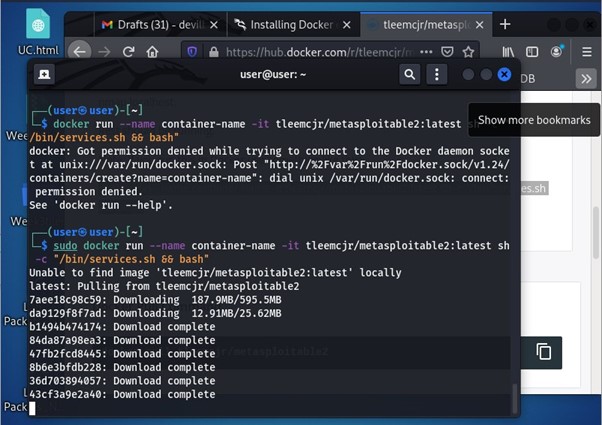
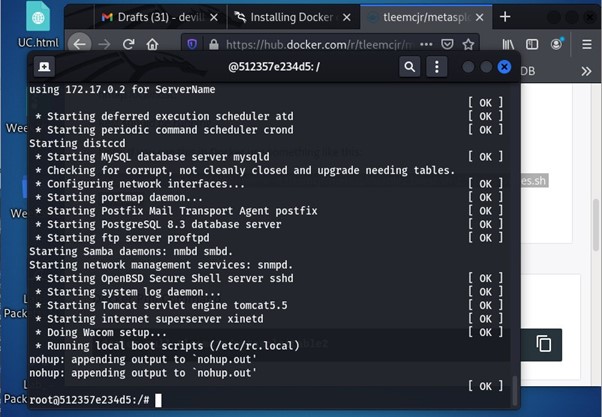
After installing metasploitable2 it is deployed as shown in the below image:
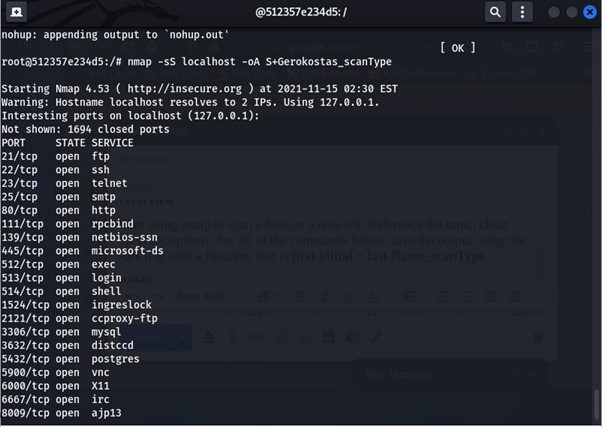
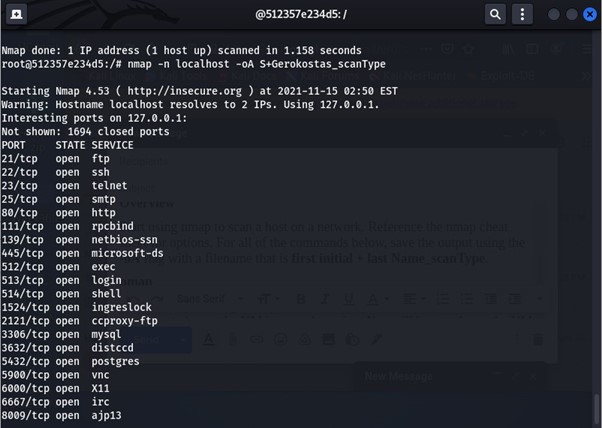
Launch nmap To Scan The Local Host:
We use the command nmap -sS localhost -oA first initial + last Name_scanType.
This command launches nmap to scan the local host for open ports and saves it in a file. The scan found multiple open ports as seen in the image.
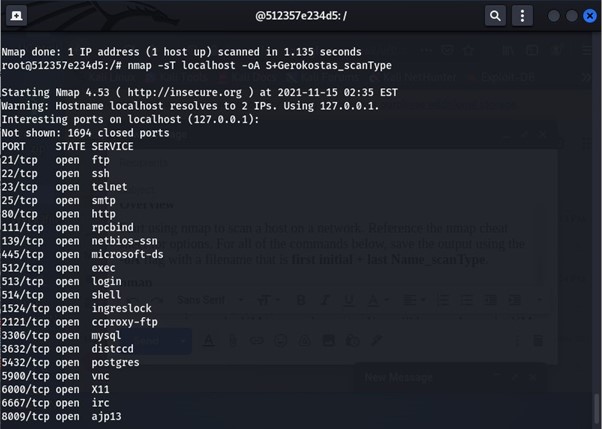
Ø You can see the nmap scanning with the -sT flag this is the TCP scan flag.
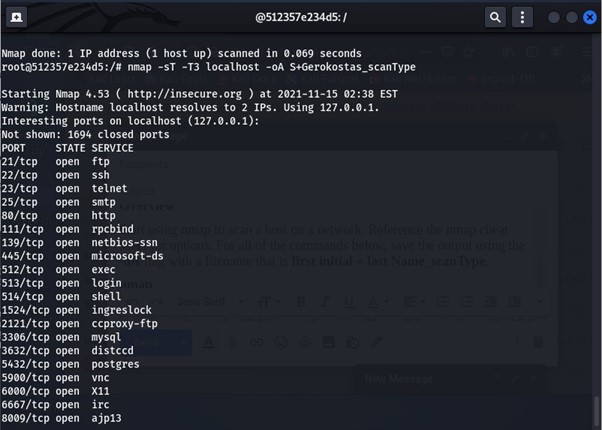
Ø The reference image shows nmap scanning with the -T3 flag this lets it scan for a normal amount of time before it stops the range varies from T0 for paranoid all the way to T5 for aggressive meaning T0 is very passive and won’t easily be detected T% is aggressive and can be easily seen by the user.
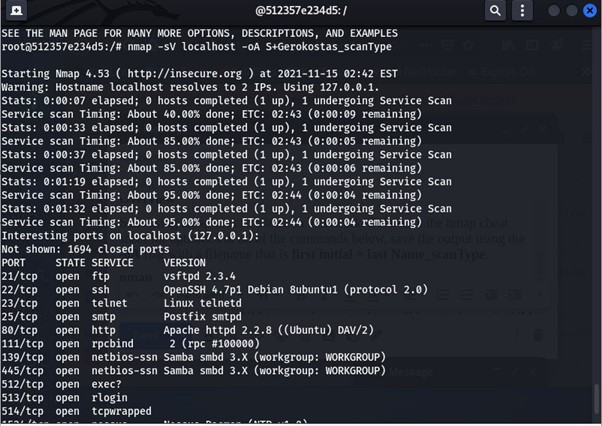
Ø Below given image shows nmap using the -sV flag which scans for the services running.
Checking the open ports :
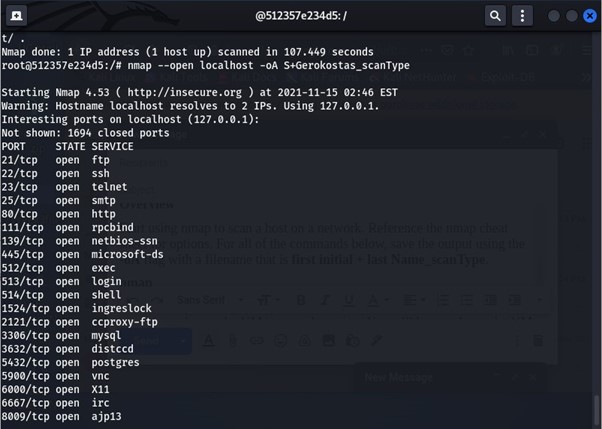
You can see the nmap using the flag –open which lists only the open ports.
This image shows nmap using the flag -PN this stops it from pinging the host when it is scanning.

The given image shows nmap using the command -n which is no DNS resolution.
Conclusion
In conclusion, we have explored the powerful combination of Kali Linux and Docker for network scanning, a game-changing approach that empowers us to perform efficient and scalable security assessments. Throughout this tutorial, we have gained valuable insights into the world of ethical hacking and penetration testing, learning how to harness the capabilities of Kali Linux and Docker to their full potential.
Stay Tuned
The best articles, links, and news delivered once a week to your inbox.
